How to Draw a Disney Character Nose?
This is an easy and step by step nose drawing tutorial for Disney characters. Let’s start!
The Structure of a Disney characters nose
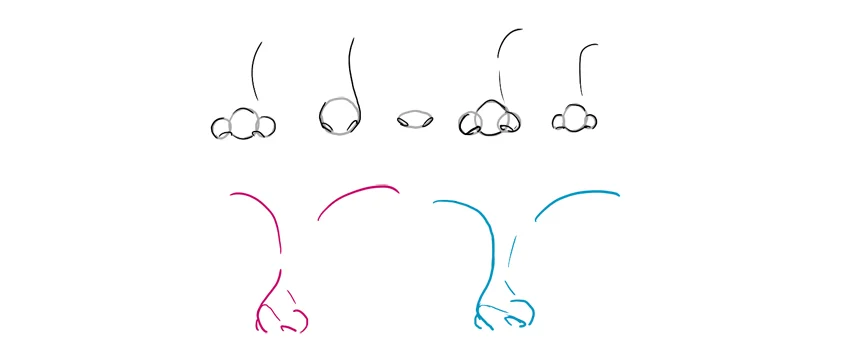
Disney characters’ noses are very easy to draw: start with a tilted ellipsoid…

… put two little spheres on the sides…

… and mark the triangular bottom of the nose.

As always, keep in mind the 3D form of the nose. This will help you draw it in rotation.

The nose holes should be sketched with a curve and never filled with black (unless in a very, very extreme view from below).

Of course, the nose is more than just the tip—it curves towards the eyebrows. However, the part in between is usually ignored, to keep the face smooth.

Disney Nose Styles
This simple structure of a nose can be modified to create various styles. Just like with the eyes, the shape of a nose can indicate the personality and ethnicity. As for the sex, Disney males usually have more prominent noses, with the whole top outlined.
Step 1
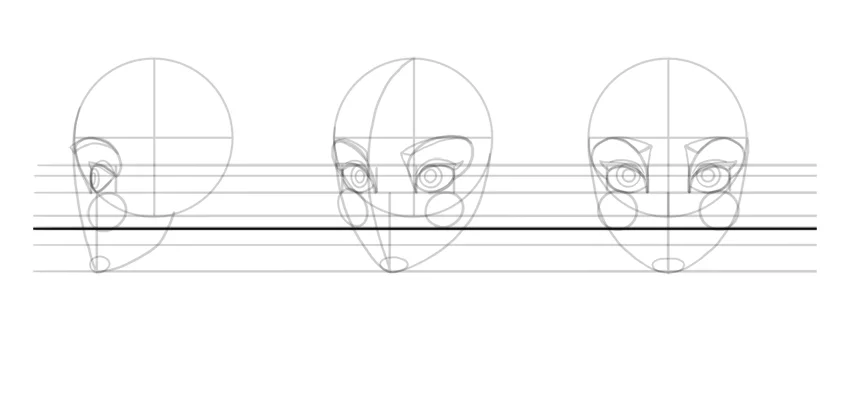
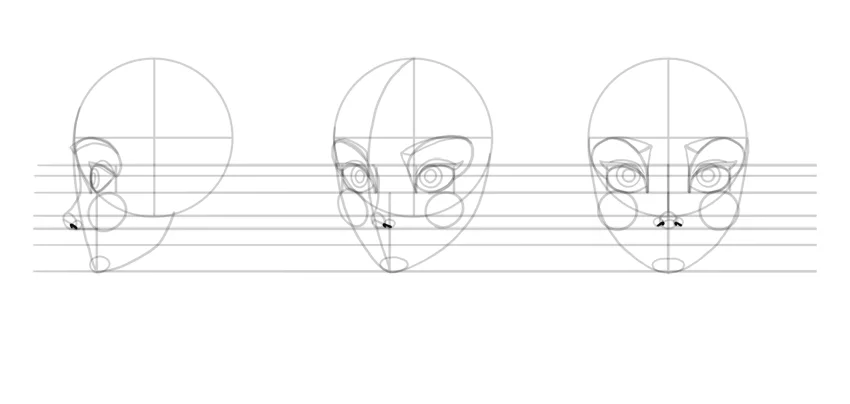
Let’s add the nose to our drawing. First, define its position—the safest one will be the middle of the bottom of the lower half of the face.
Step 2
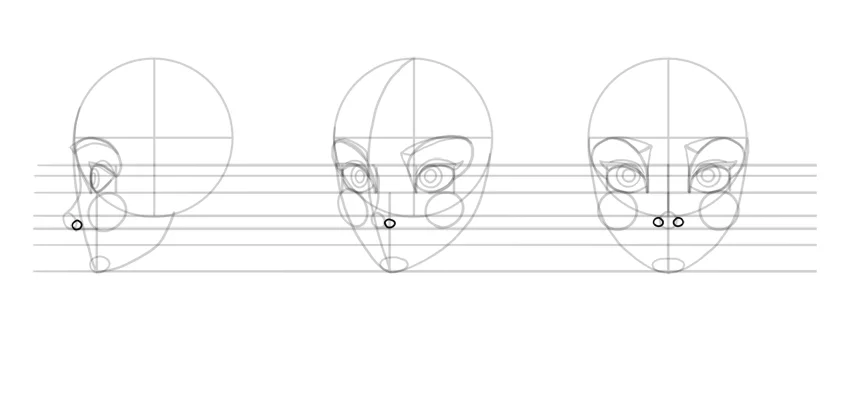
Draw the tip of the nose and its curve. Notice how it changes in perspective.

Step 3
Draw the nostrils on the sides.
Step 4
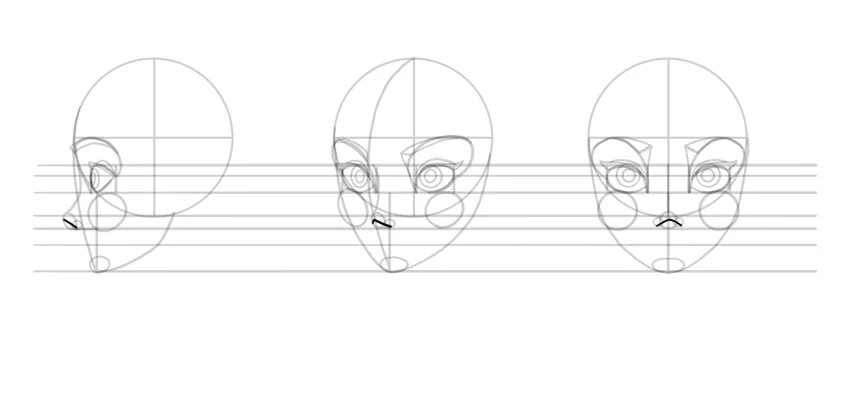
Draw the bottom of the nose.
Step 5
Draw the nose holes.
Learn also:
- How to Draw a Disney Character Head, Easy Tutorial, 9 Steps
- How to Draw Disney Character Eyes, Easy Tutorial, 5 Steps
This post was created with our nice and easy submission form. Create your post!


One Comment