Drawing a Realistic Lion, Easy Tutorial, 11 Steps, Tutorial by Dawn Darko, United States
Realistic Lion
Step 1.
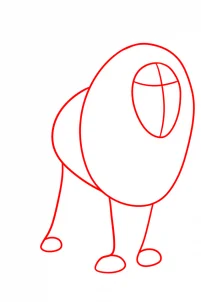
Make the guidelines and shapes to form the framework of your realistic lion that you are about to draw.

Step 2.
Let’s zoom in while we tackle the face and head. Utilize the facial guidelines to draw out the eyes and nose like you see it done for you here. Notice the slight shading at the corners and ends of the lion’s eyes.
Step 3.
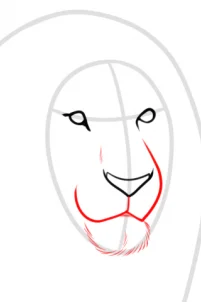
Next, begin sketching out the structure of the lion’s snout or muzzle like so. When you draw in the chin use a gentle stroke to make the hair on the chin seem soft and somewhat fluffy.

Step 4.
We will now use a light stroke as we sketch in the detailing scattered on the lion’s face. Detailing and definition should be placed on the forehead between the eyes, along with the cheeks, on the chin and around the outer parts of the face. Don’t forget to add those whisker holes and pupils.
Step 5.
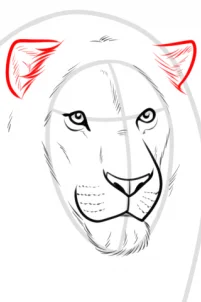
Sketch out the small shapes of each ear. Notice that they are almost hidden by the mane.
Step 6.
We will zoom out now and tackle the rest of the lion’s body and head. Start with the massive mane. The bigger the lion mane the more dominate the lion to other males. They are also more attractive to the lioness as well.
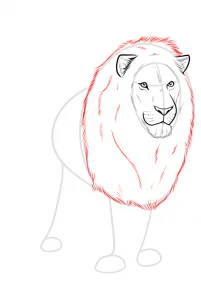
Step 7.
SDF
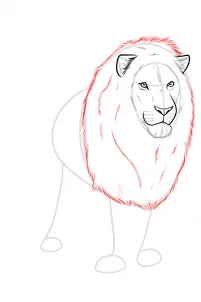
Step 8.
Once the mane is sketched out and detailed, you can draw in the front legs and paws. Notice how the paws look loose and big.

Step 9.
Almost done folks. Draw in the back end of the lion. This should also include the back leg and paw as well.
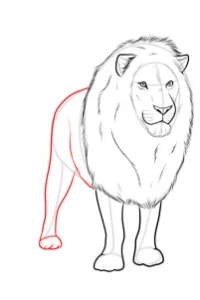
Step 10.
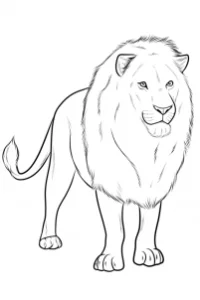
Lastly, draw the tail, the tuft of hair on the tail end, and then draw in the toe separation along with the nails. When you are satisfied with the drawing you can erase the mistakes and guides.

Step 11.
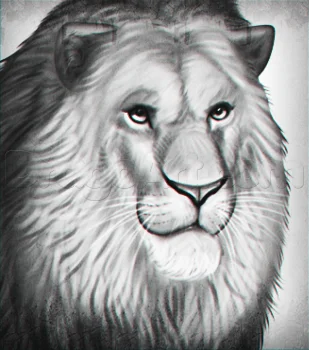
And here is the finished lesson for your lion drawn in a realistic manner. I hope you had fun and I also hope you learned something new with this drawing lesson.
Learn more:
- How to Draw Abu from the animated film Aladdin, 7 Steps
- How to Draw a Reindeer For Kids, Easy Tutorial, 6 Steps


One Comment